Hand Embroidery Stitches⁚ A Comprehensive Guide
Hand embroidery, a global craft, uses various stitches to decorate fabric. There are hundreds of stitches, from basic to complex. This guide explores essential stitches for beginners and advanced techniques. Learn to create beautiful art with thread and fabric using our PDF resources.
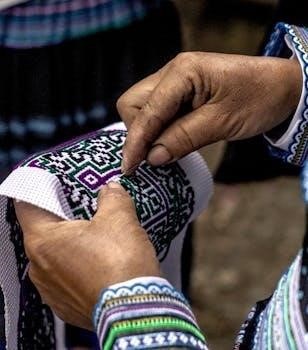
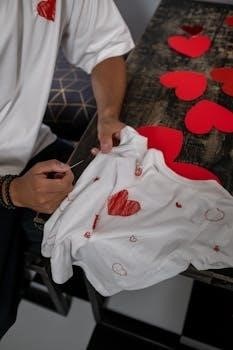
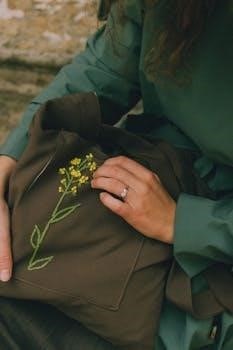
Hand embroidery is a captivating art form, where fabric is embellished with needle and thread, offering a world of creative possibilities. It’s an accessible craft, requiring just a few basic stitches to begin. With hand embroidery, you can create beautiful patterns, textures, and lettering. This technique has been practiced globally for centuries, evolving into numerous regional styles. From simple designs to intricate masterpieces, hand embroidery allows for a personal touch on any project. Its versatility makes it a popular choice for both beginners and experienced crafters. The beauty of hand embroidery lies in its adaptability, offering endless potential for individual expression through various stitches, threads, and fabrics. Many find the process both relaxing and rewarding, transforming ordinary materials into extraordinary works of art. Whether you are looking to embellish clothing, create wall art, or simply enjoy a new creative hobby, hand embroidery provides a fulfilling and artistic outlet. Dive into the world of embroidery and discover the joy of working with needle and thread.
Basic Hand Embroidery Stitches for Beginners
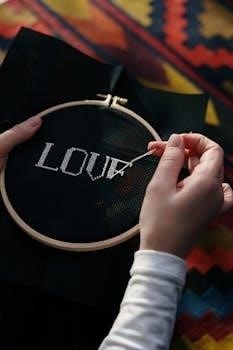
For those new to hand embroidery, mastering a few basic stitches is key to starting any project. These foundational stitches are the building blocks for creating beautiful designs. Essential beginner stitches include the running stitch, a simple in-and-out motion, perfect for outlining. The backstitch, another fundamental stitch, creates a solid line and is ideal for lettering. Split stitch, where the needle pierces the thread, adds a textured line. Stem stitch, used for delicate outlines, is similar to the backstitch but with a slight twist. Satin stitch fills areas smoothly with color; Finally, French knots add texture and are great for creating dots. These six stitches are the most commonly used and are easy to learn with practice. These basic stitches can be combined and varied to create a wide array of designs. Learning these stitches is the first step to unlocking the world of hand embroidery and provides a solid foundation for more complex techniques. With just a few supplies, you can master these basics and begin your embroidery journey.
Running Stitch
The running stitch, a fundamental stitch in hand embroidery, is perhaps the simplest and easiest to learn. It’s created by passing the needle in and out of the fabric at regular intervals, forming a dashed line. This stitch is often the first one taught to beginners due to its straightforward nature. It serves as the basis for many other embroidery techniques and is versatile in its application. You can use the running stitch for outlining shapes, creating dashed lines, or even gathering fabric. Its simplicity makes it quick to work, and it’s excellent for both straight and curved lines. The stitch length and spacing can be varied to create different visual effects. While it might seem basic, the running stitch is a staple in embroidery, allowing for endless creativity and versatility. Its ease of execution makes it a perfect starting point for anyone new to hand embroidery and is widely used in various projects.
Backstitch
The backstitch is another essential stitch in hand embroidery, known for creating solid, continuous lines. Unlike the running stitch, the backstitch produces a line that resembles machine stitching. To execute it, you bring the needle up through the fabric, then insert it back down a stitch length behind where it emerged, creating a continuous line. This stitch is particularly useful for outlining shapes, adding details, and creating lettering. It’s a great choice when you need a strong, defined line in your embroidery design. The backstitch is relatively simple to learn but offers a professional, clean finish. It’s also used as a base for other stitches, making it a versatile technique. It can be used on a variety of fabrics and is a go-to stitch for many embroidery projects. Mastering the backstitch is crucial for any embroiderer, whether beginner or advanced, because it provides a solid foundation for more complex embroidery work and designs.
Split Stitch
The split stitch is a versatile hand embroidery technique that creates a textured, rope-like line. This stitch is ideal for outlining shapes and adding fine details to embroidery designs. To begin, bring the needle up through the fabric and then insert it back down a stitch length away. However, instead of bringing the needle back up at the beginning of the previous stitch, you bring it up through the center of the previous stitch, splitting the thread. This splitting action is what gives the split stitch its unique, textured appearance; The stitch is excellent for creating curves and organic shapes. It works well with multiple strands of floss, making it easy to adjust the thickness of the line. The split stitch is favored for its durability, making it suitable for projects that will undergo wear and tear. It adds a subtle dimensional quality to embroidery, enhancing the overall visual appeal. It’s a fundamental stitch that many embroiderers find useful for a wide range of projects.
Stem Stitch
The stem stitch is a foundational hand embroidery technique renowned for its ability to create smooth, flowing lines. Often used for outlining shapes, lettering, and, as its name suggests, creating stems and vines, this stitch offers both versatility and a pleasing aesthetic. To execute a stem stitch, bring your needle up through the fabric, then make a short stitch forward. Bring the needle back up halfway through the previous stitch, ensuring that the thread always comes out on the same side of the stitch, either above or below. This consistent method gives the stitch its characteristic slightly twisted appearance. When worked closely, the stem stitch forms a continuous, solid line, which makes it suitable for detailed work. It is also useful for filling small areas, as the lines can be worked close together. The stem stitch is considered a staple in many embroidery projects and is favored for its ease and the neatness it brings to embroidered designs. It can be used with various thread weights, adapting to different styles and applications.
Satin Stitch
The satin stitch is a classic embroidery technique prized for its ability to create smooth, solid areas of color. It’s commonly used to fill shapes and is a favorite for both hand and machine embroidery. To execute the satin stitch, bring the needle up through the fabric on one edge of the shape you want to fill, and then bring it down on the opposite edge, creating a long, smooth stitch. The stitches should lay closely next to each other, without any gaps, to achieve a polished, satiny effect. It is essential to keep the tension even, as uneven tension can cause puckering or loose threads. The satin stitch is best suited for smaller shapes, as large areas can become difficult to manage. Beginners often start by practicing satin stitches on simple shapes like leaves or small petals before moving onto more complex designs; When done correctly, the satin stitch creates a luxurious, smooth look that makes any embroidery design stand out. Different colors can also be used side by side to create striking effects.
French Knots
French knots are a decorative embroidery stitch that creates small, textured dots. They are widely used to add dimension and interest to embroidery designs. To make a French knot, bring your needle up through the fabric, then wrap the thread around the needle once or twice. Holding the thread taut, insert the needle back into the fabric very close to where it came up, but not in the same hole. Pull the thread through gently, creating a small, neat knot on the surface. The size of the knot can be adjusted by changing the number of wraps around the needle; more wraps create larger knots. French knots are versatile, and they can be used to fill areas, make flower centers, or to add texture to an embroidery piece. It is important to keep the thread tension consistent to ensure each knot looks uniform and does not unravel. Beginners often find French knots a bit tricky to master, but with practice, they become an easy and essential part of the hand embroidery skillset. The stitch adds a unique visual and tactile element to any project.
Commonly Used Embroidery Stitches
Beyond the basic stitches, there are numerous commonly used embroidery stitches that every stitcher should know. These stitches form the backbone of many embroidery projects, allowing for a wide range of textures, lines, and fills. The satin stitch, known for its smooth, filled appearance, is a frequent choice for covering areas with solid color. The chain stitch, with its looped pattern, is popular for outlines and decorative lines. Various knot stitches, like the French knot, add texture and dimension. Stitches like the lazy daisy, a simple loop stitch, are used for creating floral designs and other embellishments. These stitches are not only useful but also versatile, allowing embroiderers to adapt them to different design needs. Mastery of these commonly used stitches opens up a world of creative possibilities, allowing you to bring complex and intricate designs to life. Knowing when and where to use each stitch is crucial for achieving professional-looking results. These stitches form an essential part of any embroidery project and are frequently used in a multitude of patterns.
Stitches for Outlining and Filling
Embroidery projects often require specific stitches for outlining shapes and filling areas with color or texture. For outlining, the backstitch is a fundamental choice, creating a solid, continuous line. The stem stitch is another popular option, offering a slightly textured and rope-like appearance, perfect for flowing lines and stems. The split stitch, similar to the backstitch but with a slightly different texture, is also frequently used for outlining. When it comes to filling, the satin stitch stands out, providing a smooth, even surface of color. The long and short stitch is another valuable technique for filling large areas, creating a more shaded and nuanced effect. These stitches are essential for bringing depth and dimension to any embroidery design. Mastering these techniques allows you to create both defined outlines and filled areas that complement each other and add visual interest to the overall piece. The combination of these stitches is the foundation of many beautiful hand embroidered pieces. Knowing these stitches is a must for any embroiderer.
Specialized and Decorative Embroidery Stitches
Beyond the basics, hand embroidery offers a wide array of specialized and decorative stitches that add unique textures and visual interest to projects. French knots, for example, are small, raised dots that can be used to create texture or fill small areas. The bullion stitch, a coiled stitch, can create interesting lines and shapes. There are also stitches like the lazy daisy, often used for creating floral motifs, and the feather stitch, known for its delicate, feathery appearance. Other decorative options include the seed stitch, which creates a scattered, textured effect, and various types of couching stitches, which allow for the secure attachment of threads or cords to the fabric surface. These specialized stitches allow for a wide range of creative expression in embroidery projects. Mastering these techniques will bring your embroidery to the next level, allowing for more detailed and visually interesting results. Experimenting with these stitches can result in stunning, unique designs that showcase your creativity. Each stitch adds its own unique characteristic to the fabric.
Hand Embroidery Stitch Categories
Hand embroidery stitches can be broadly categorized based on their function and technique, leading to diverse styles. One primary category involves stitches for outlining, used to define shapes and create lines, such as the backstitch, stem stitch, and split stitch. Another major category is filling stitches, designed to cover areas with color and texture; these include satin stitch and long and short stitch. Decorative stitches, like French knots and bullion knots, add embellishment and detail. Additionally, embroidery is often categorized by the method of execution, such as open work, which involves creating patterns with spaces in the fabric; counted thread work, where stitches are based on the fabric’s weave; and colored work, which uses various colors to create designs. Regional-specific embroidery further categorizes stitches based on cultural traditions and techniques. Understanding these categories helps in selecting appropriate stitches for different projects and effects. These categories also help organize the vast number of stitches and techniques.
Open Work, Counted Thread Work, Outline & Void Work
Hand embroidery encompasses diverse techniques, including open work, counted thread work, and outline & void work, each offering unique aesthetic qualities. Open work involves creating patterns by removing threads from the fabric, resulting in delicate, lace-like designs, with techniques like drawn thread work and pulled thread work. Counted thread work relies on the fabric’s weave to create uniform stitches, producing geometric designs, and includes forms like cross-stitch and Hardanger. Outline work focuses on defining shapes and lines with stitches such as backstitch and stem stitch, which provide clear boundaries. Void work, often used in combination with outline work, creates patterns by leaving areas unstitched, allowing the fabric to show through and form part of the design. These methods showcase the versatility of hand embroidery, enabling the creation of a wide array of textures and visual effects. Understanding these distinctions enriches embroidery skills and project possibilities.
Colored Work and Regional Specific Embroidery
Colored work in hand embroidery involves the strategic use of threads in various hues to create patterns and visual depth. It allows for intricate designs that bring vibrancy and life to fabric projects. Regional-specific embroidery, on the other hand, showcases the distinct styles and techniques developed in different parts of the world. These unique styles often reflect local traditions, cultures, and available materials. For example, some regions might be known for their use of bright, contrasting colors, while others favor more subdued or monochromatic palettes. Patterns and motifs often carry cultural significance, telling stories or representing local flora and fauna. Exploring regional-specific embroidery provides insights into the rich history and diversity of this craft. These styles offer a wide range of inspiration and techniques for both beginners and experienced embroiderers, highlighting how color and tradition play a crucial role in hand embroidery.
Resources for Learning Hand Embroidery
Numerous resources are available for those eager to learn hand embroidery. Online platforms, such as blogs and video tutorials, offer step-by-step guidance for various stitches, catering to all skill levels. Many websites also provide downloadable PDF guides that summarize essential techniques and stitches, making them easily accessible. Books dedicated to hand embroidery offer comprehensive information, including detailed illustrations and project ideas. Local craft stores and libraries can be valuable sources for physical books, patterns, and sometimes even in-person workshops. Joining online embroidery communities and forums allows learners to connect with fellow enthusiasts, share their work, and ask questions. Furthermore, some experienced embroiderers offer personalized online lessons, providing tailored instruction. These resources enable anyone to learn at their own pace and explore the world of hand embroidery, regardless of their initial skill level or location.